Engine Heaters | Farmer Bob's Parts and Supplies LLC
Posted by Bobby the Farmhand on Dec 2nd 2020
Engine Heaters a Farming Necessity
Farmer Bob has used five types of engine heaters over the years: magnetic oil pan heaters, stick-on heaters, lower radiator hose heaters, heater hose engine heaters and engine block heaters.
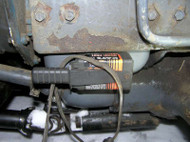
For those of us that operate trucks and equipment every day during cold weather, I recommend keeping a good magnetic oil pan heater in a place in the shop where it is easy to find.
Regardless of what type of heater you use every day, they are all prone to failure at some point. A good high-quality magnetic oil pan heater will bail you out of trouble. Remember to select a heater rated for the larger engines we use on the farm.
I recommend at least 300-watt heaters. To use this heater, simply attach it to the lowest flat part of the engine oil pan and plug it in.
Over the last few years, stick-on engine heaters are being recognized for their effectiveness. Installation is relatively easy, requiring a clean, flat surface and temperatures warm enough for the glue to adhere to the surface. Again, make sure you install a heater large enough to warm the engine size you have.
Bill Hoffman, a farmer near Stanley, North Dakota, says, “We use glue-on heaters on the oil pans of our trucks, and by using an inverter, use the heaters to keep the valves from freezing on the water trucks we use to deliver water to cattle in the winter.”
As we move on to engine heaters, which heat the engine block using the coolant system, it is very important to note that the primary failure of the elements in these heaters is caused by minerals in hard water.
I recommend using a good Fleet coolant pre-mixed or mixed with distilled water. Just as the element in your home hot water heater will accumulate minerals and fail, so do the elements in engine block heaters.
I have installed many lower radiator engine heaters over the years. They are easy to install, compared to engine block heaters, and are fairly reliable. You will need to drain the coolant from the system before installation. Once the coolant is drained, cut out a piece of the lower radiator hose sufficient to allow the heater to be inserted into the hose.
Prep the ends of the heater with hose sealant, place hose clamps over each end of the cut-out section and insert the heater. Tighten the clamps and replace the coolant with a high-quality Fleet coolant – pre-mixed or mix your own using distilled water.
Perhaps the least complicated coolant heater to install is the type that goes in the heater hose system. Again, it is important to use a hard-water free coolant, but it is not necessary to drain the entire system to install one of these heaters.
First, determine which hose goes from the water pump to the heater core and which hose comes from the heater core back to the engine block. Place a collection pan under the area where you intend to cut the line to catch the small amount of coolant you will lose.
Select a location in the heater return line that will allow the heat from the heater to travel up to the engine block inlet by convection. Cut the line and insert the heater using the same technique mentioned earlier for the lower radiator engine heater.
This brings us to the most difficult engine heater to install – but also the most trouble-free and effective. The engine block heater is my preferred heater, and after installing one or two, you will not find them that daunting.
As with the lower radiator hose heater, you will need to drain the coolant system. You will be removing a soft plug from the engine block, so it is important that you talk to your equipment dealer to determine what model heater you need for the specific engine you are installing.
Once you know what heater you need, you can usually get these heaters from your auto-parts store. Remember to get a heater with adequate wattage to heat the engine you are working with. Installing a heater with insufficient wattage in an attempt to keep the power bill low on a sub-zero morning will leave you disappointed when the engine will not start.
To save power on warmer nights, use a timer at your electrical outlet to reduce the number of hours the engine heater is on.
Use a small chisel or flat screwdriver to remove the soft plug you have chosen to use. Remove any coolant residue from the hole in the water jacket and insert the heater in the hole.
When you have the heater in place, carefully tighten the screw or nut expanding the rubber seal, locking the heater in place. Refill the coolant system with pre-mixed Fleet coolant or coolant you have mixed with distilled water.
One last note: When energizing these heaters, it is inevitable that you will need to use an extension cord. To allow your heater to function properly and avoid damage to the heater, it is important to use a heavy-duty cord capable of carrying the wattage you need for the heater.
The longer the distance from the outlet to the heater, the heavier the cord should be. I use a 100-foot, 10-gauge cord to power all of my larger heaters.
You are now prepared for years of trouble-free cold weather engine starts. end mark

